Recently I've had the pleasure of teaching a newer class
at The Academy of Art University, SF. During each class period I
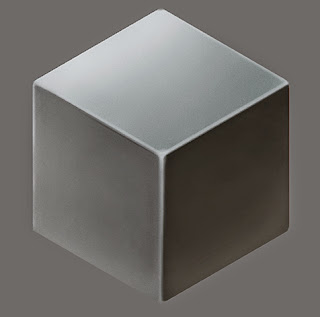
digitally paint a different material / texture on a cube in Photoshop
from scratch
while I talk about the material of the week, the painting process, how to analyze, simplify and
make the most out of your reference while simultaneously strengthening
critique language and constructive criticism abilities among the
students. Each demo is finished in about 2 hours. Below are some
examples:
Showing posts with label digital painting. Show all posts
Thursday, November 13, 2014
Tuesday, August 13, 2013
Tuesday, October 9, 2012
Photoshop brush test.
Lately, I have been refining my knowledge of custom brushes in Photoshop. I followed a tutorial by Brian Recktenwald, from the book "Digital Painting Techniques", to set up a single custom made brush which has the ability to make multiple types of marks. The exercise has you create a brush from an ink splatter (with some Photoshop tweaks) and convert it for use as a smudge tool. What was most interesting for me however, was the idea of getting the most variety out of one brush as possible. This is accomplished by modifying the brush settings (shape dynamics, scattering, texture etc.). Combine that technique with a Wacom tablet or Cintiq with pressure sensitivity and you can simulate traditional 2D media very effectively.
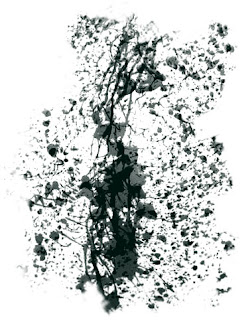
I created a brush that would be useful for creating a rough surface and then modified it using some of the techniques I learned in the Digital Painting Tutorial. Here is what my "raw" brush looks like:
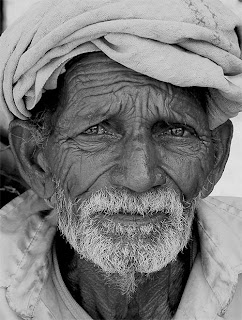
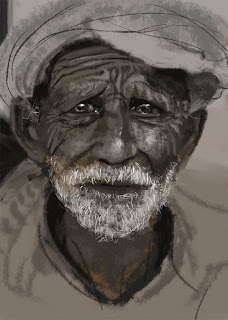
I then found some photo reference of a rough faced old man to test my brush. The image was found here and was taken by the photographer Anil Purohit. I did not trace the image, or sample colors, values etc. from the piece, but instead used the traditional method of sighting my reference and directly painting in the way I would approach an acrylic painting. I was not attempting to perfectly duplicate the photo, but rather use it as a reference point to work from. You may notice that in my version, the head is more straight on, and the expression is more melancholy.
The first stage is to block in my shapes and values using broad stokes with a large version of my custom brush.
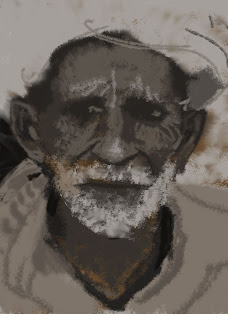
The second stage is where I refine my shapes using a smaller brush with less scattering dynamics.
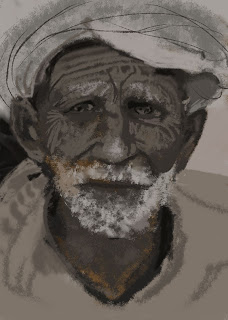
The final stage is where I add the darkest darks, and lightest lights to the piece while adding a focal point (the eyes). This is done with the smallest version of my custom brush.
Thursday, February 9, 2012
Sneak peak from Triangulum.
My lady sometimes snaps photos of me when I am working. Here is the artsy fartsy we were up to the other night which includes a sneak peek of my latest piece for the Modern Eden show opening Saturday. Amanda is working on some new line art that will be transferred to linoleum blocks to carve for the new upcoming block printing class she'll be teaching at Workshop. Check it all out!
Friday, January 27, 2012
Spring 2012 at AAU.
Labels:
2012,
AAU,
bird,
collage,
digital painting,
illustration,
nature,
ryan gannon,
spring
Friday, September 23, 2011
Friday, July 16, 2010
Wednesday, November 19, 2008
Wednesday, August 6, 2008
In progress...
This is my most recent personal in progress piece. It is from an old sketch I rediscovered and decided to turn into a finished piece digitally. It is temporarily on hold for another project right now, but it will be the first thing I get back into when I am done with my current work. You should see this thing full size.
Ergophobia
A month since the last post??? Sorry guys and gals, but I have been hard at work on some freelance, personal and commissioned work on top of my full time job. I recently did a series of 3 illustrations and 10 designs for the surf clothing company Ergophobia to be used on 3 shirts as part of their Artist Series. The release date for the shirts is not yet set, but here is a link to Ergophobia so you can see the sort of work they do.
http://www.ergophobia.com/
And here is a a sneak peak at my work for them...
http://www.ergophobia.com/
And here is a a sneak peak at my work for them...
Personal logo and signature to be printed on inside of t-shirt and used as part of the tag design.
Wednesday, June 18, 2008
Sneak peek!
Sunday, June 15, 2008
Come on in!
Welcome! This blog is going to be a mixture of (in no specific order) drawings, paintings, photographs, sounds, explorations, experiments and stories all crafted by me, to be shared with you! I hope it makes you tingle with joy... Thanks for swinging by!
If you have any questions, feel free to contact me at:
rhgannon1@gmail.com
All work copyright Ryan Gannon 2008.
If you have any questions, feel free to contact me at:
rhgannon1@gmail.com
All work copyright Ryan Gannon 2008.
Subscribe to:
Posts (Atom)